
Batch Tool Production

I know, I feel you. You see a tool made by a small producer. You want the tool. You want to support small business and independent craftspeople…but they have a mile long wait list… or don’t even have a wait list…or won’t even return your email.
I’m about 20 years in as a tool maker and I can see it from both sides. Trust me, it’s a challenge for them too. Sourcing parts, doing the administrative work, the shipping, the communication and finally, actually making the tool, can be challenging in ways tough to anticipate. Often the market size doesn’t support scaling up to a level of large production. So folks do their best to meet demand with whatever means they can. For the last few years, I’ve been working with a fantastic machinist on my Caliper, but he just informed me this will be the last year, so I’m back to searching out a new source. These setbacks can be expensive and kill production, leaving no one happy.
Even with the headaches and frustration, I truly enjoy designing tools and making them available. One key lesson I’ve learned is to enlist makers better than me to fulfill the demand. Last year, I started working with Caleb James and Tim Manney to produce the T2. We use blades made by Paul Clark (who works with Jason Lonon). It’s a dream team of production. I’m not bragging or trying to sell you on the tool, I’m pointing out what it takes to make these things work. I’ve been working with all three to make the parts go together better, faster and easier so to the tool can be continuously produced. Here is a batch of tools available for purchase on my website.
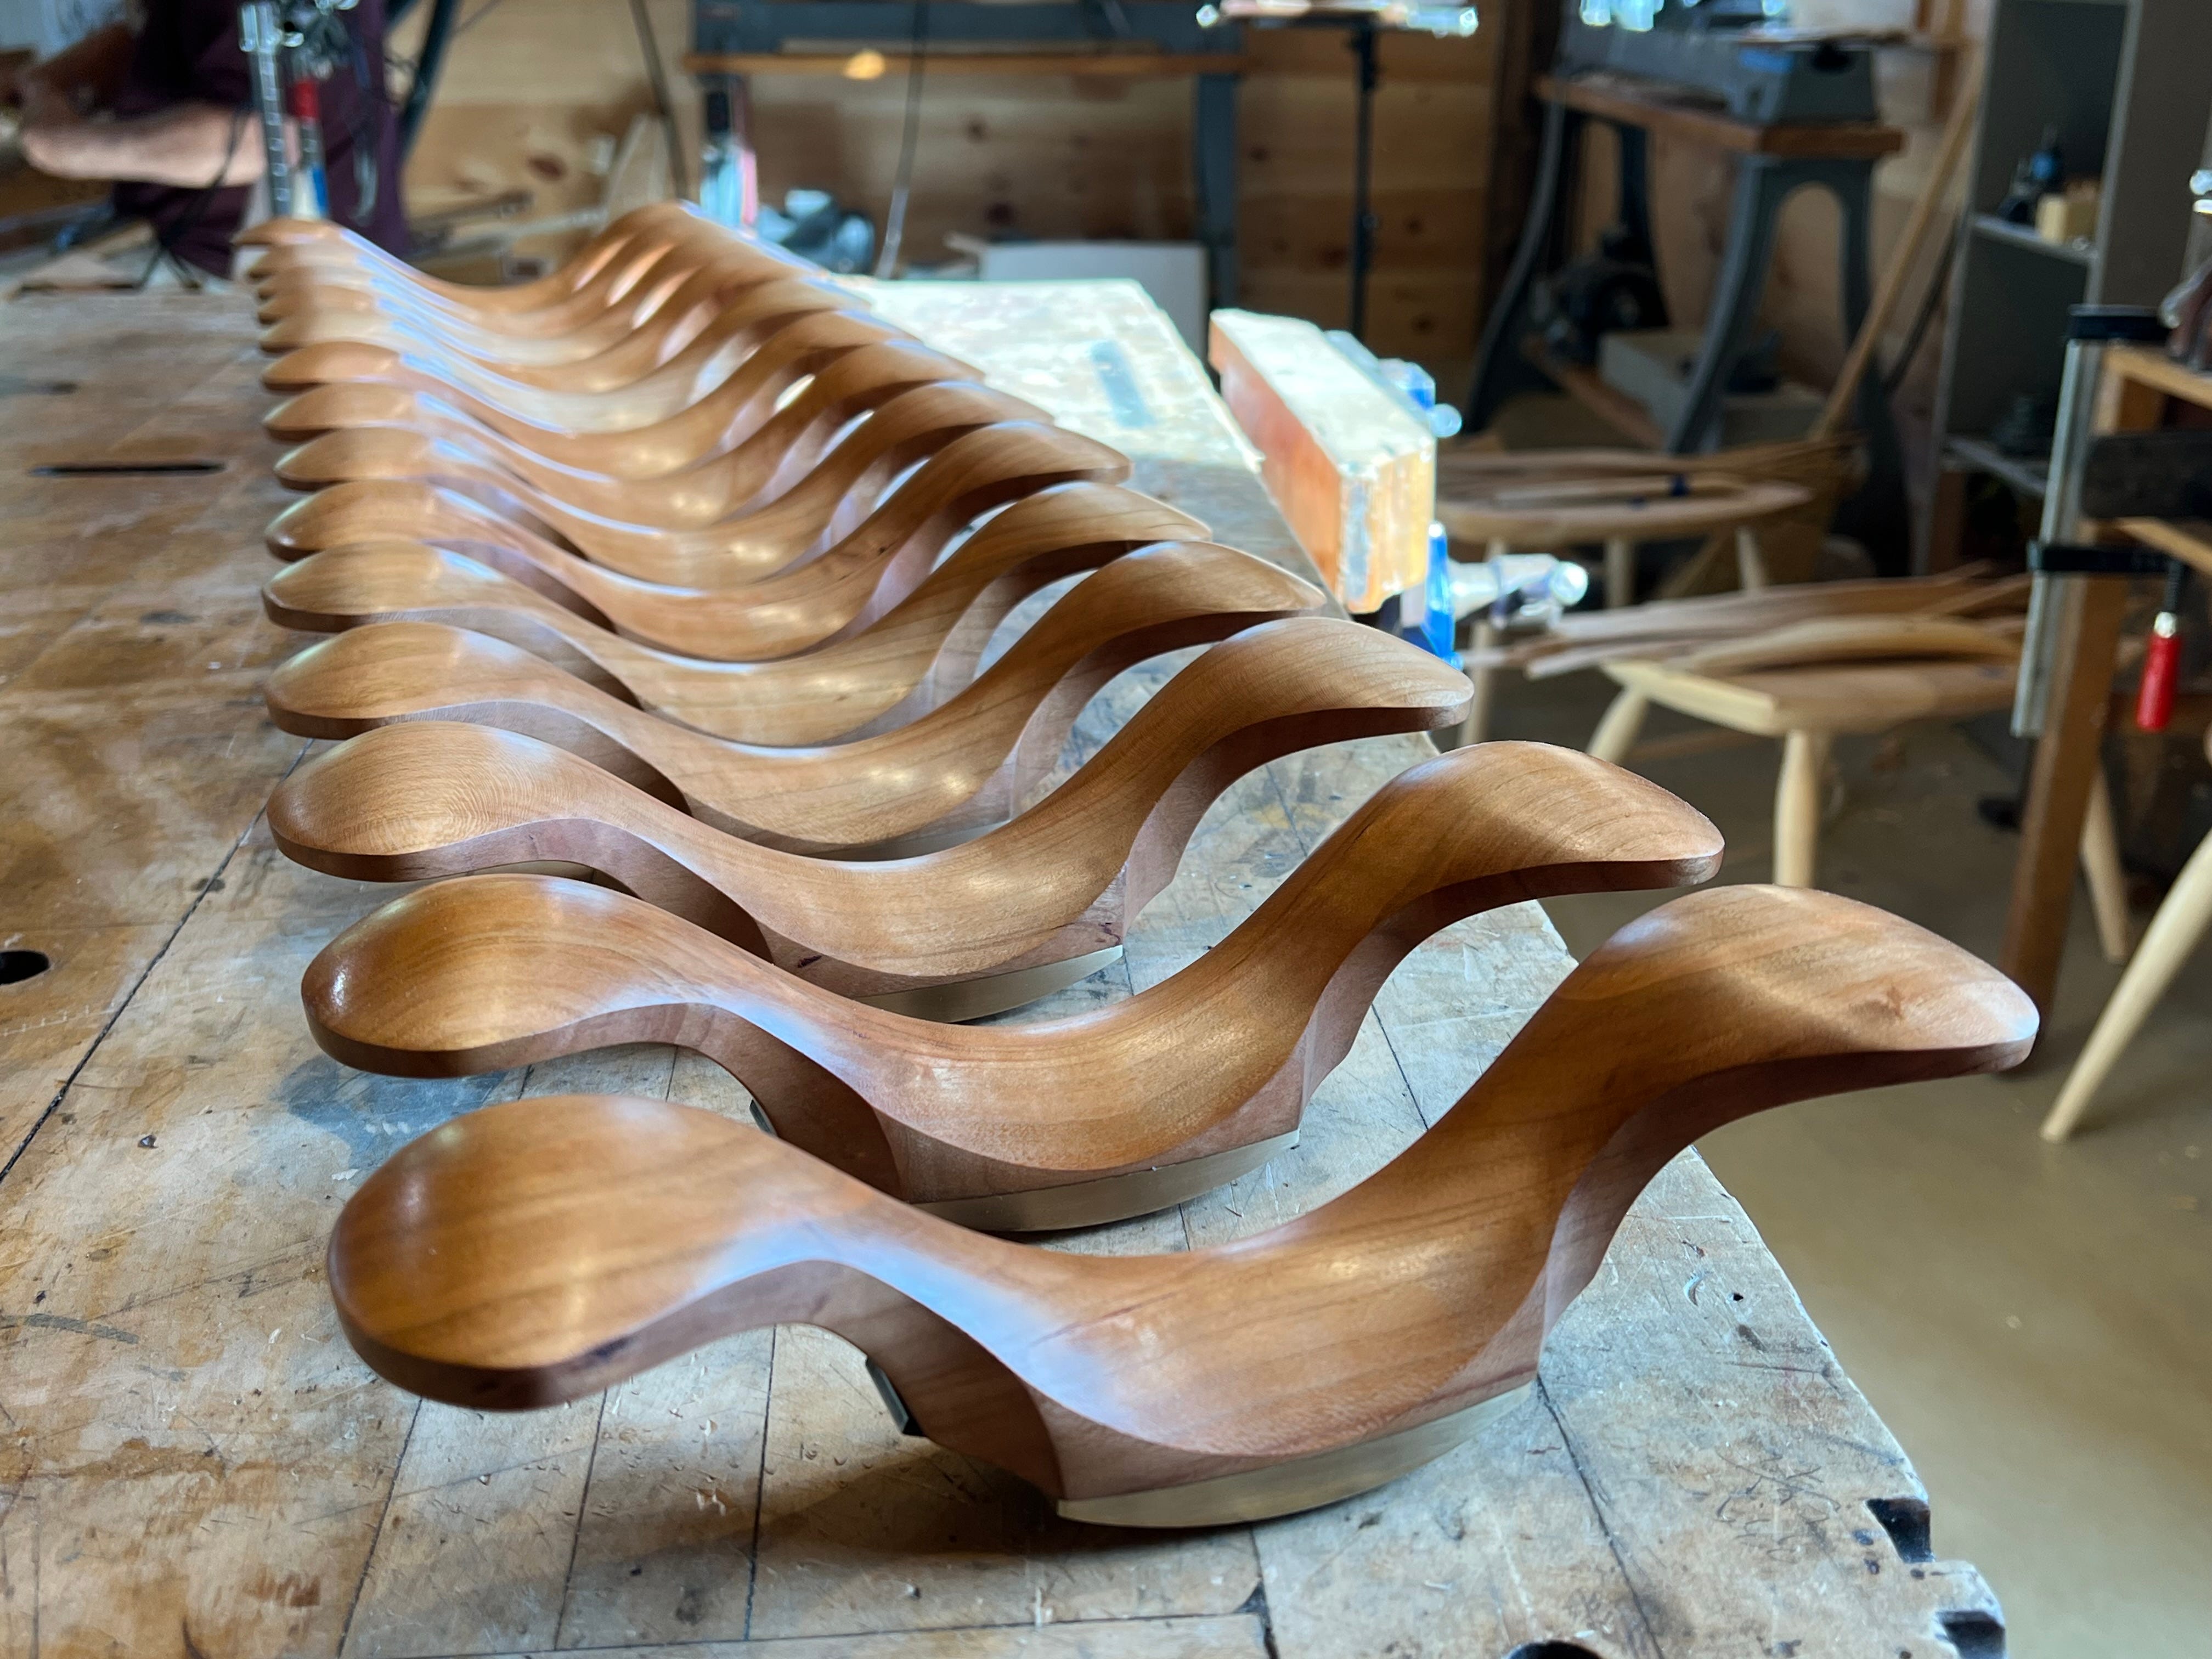
Tim is doing the assembly, finish and tuning. He’s been diving deep into the process to make it as smooth as possible. It’s a sweet spot for his skill set. I’m definitely better at the development of the tools and sourcing. I’m so grateful Caleb stepped up to make the bodies. The first company I worked with sent us parts with huge variations in quality and shape. The parts took way too much work to finish. Caleb’s parts are as near perfect as I could ask for. Once this lot is sold, I’ll take down the button on the site until we have more, but I hope this is the beginning of a steady stream tools now that the bugs are out of the system.
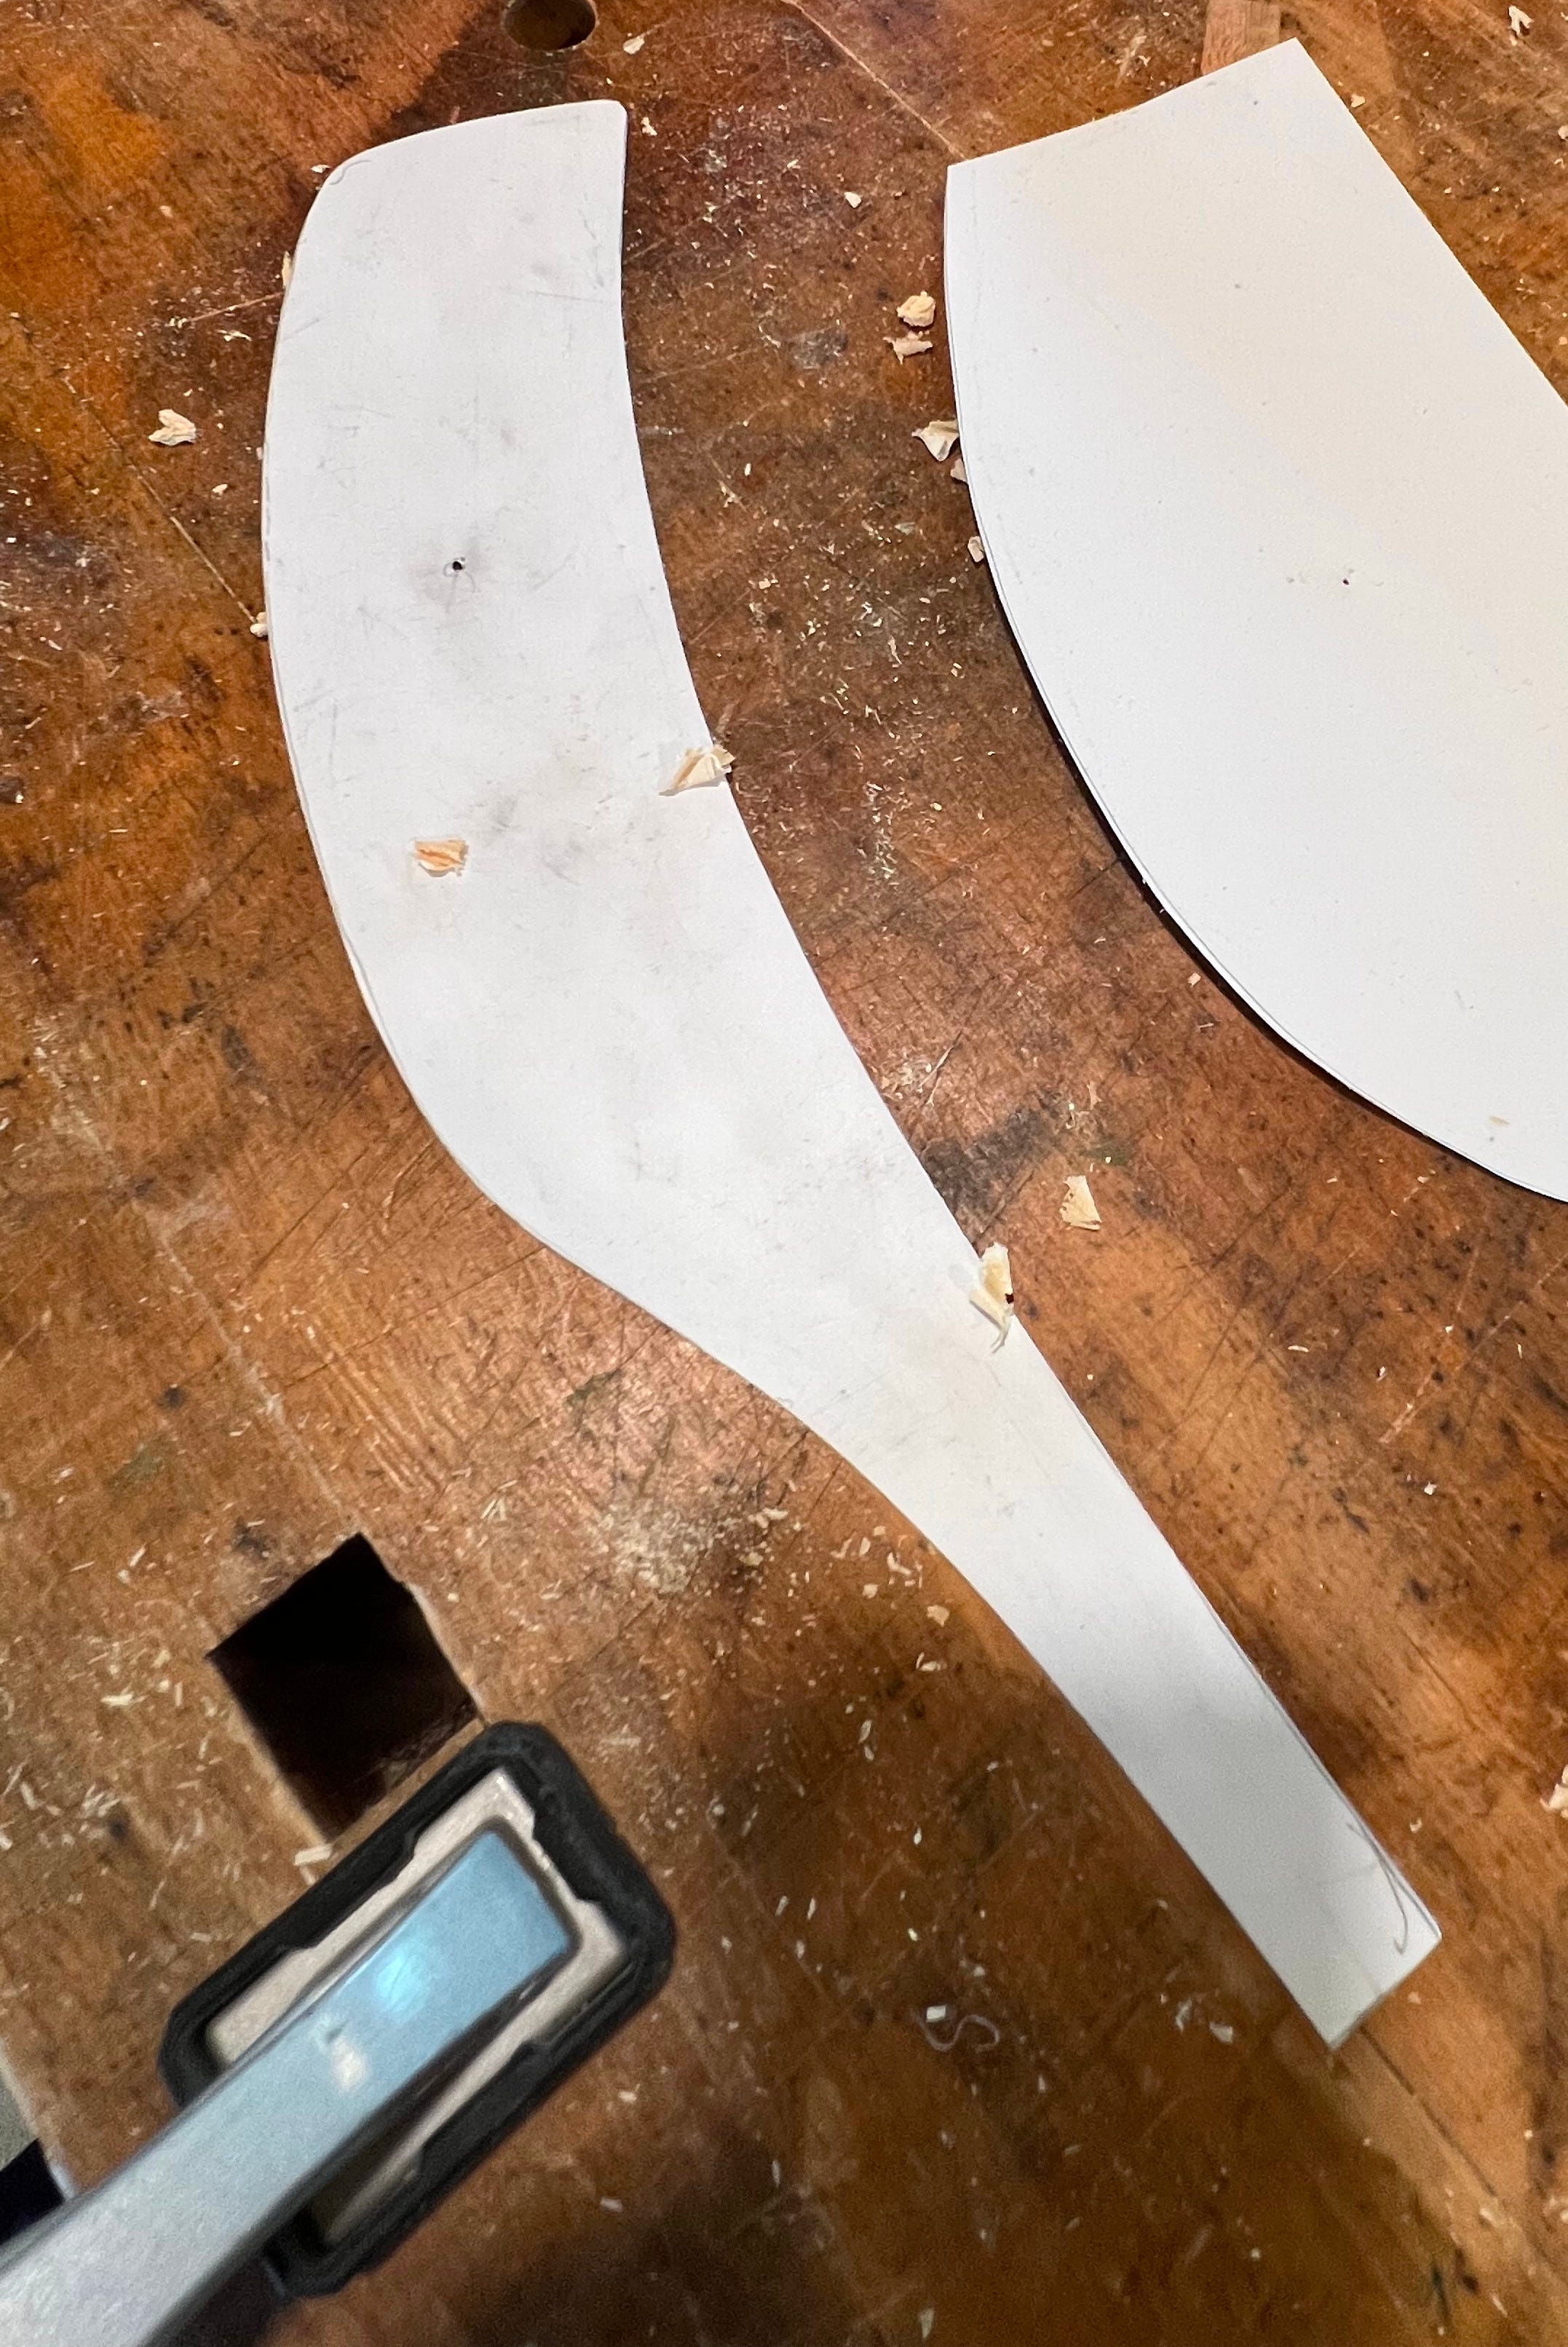
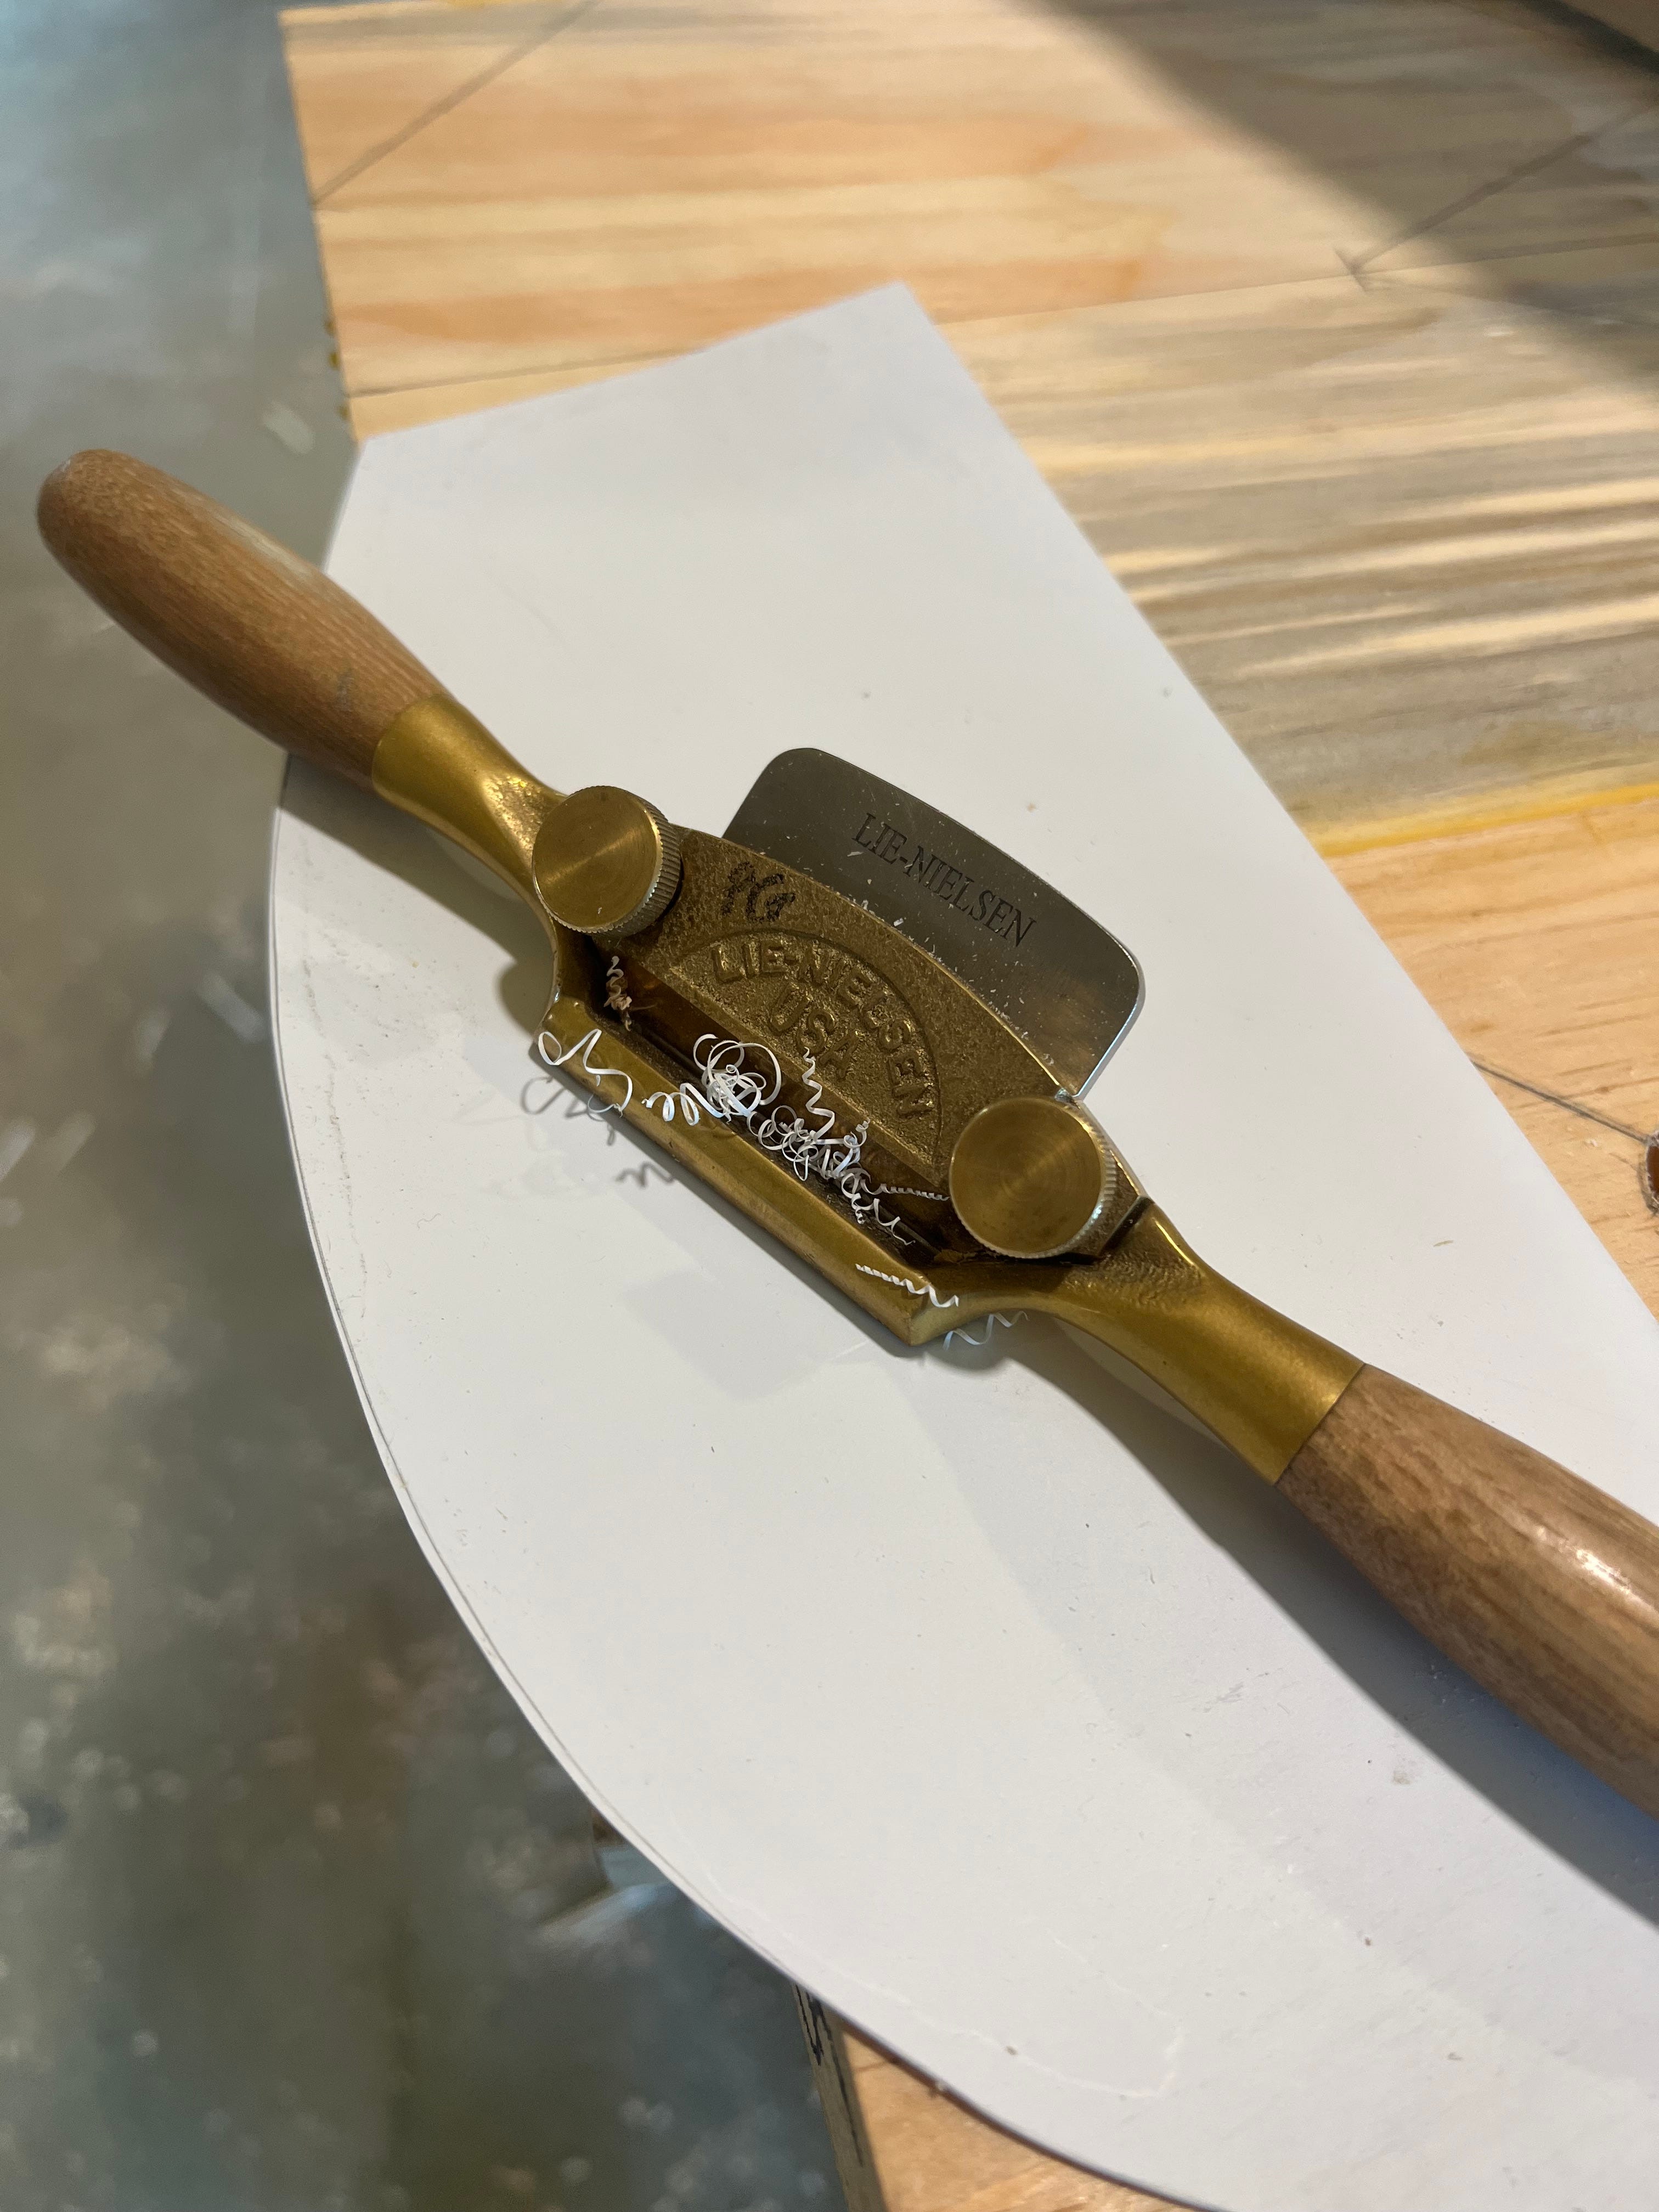
Recently, I fixed a couple of broken links on the bottom of my student tool list page, but because most folks probably won’t make it that far into the website, I want to share one that I find super useful in the shop. It’s a white styrene plastic I use for making patterns.
Unlike poster board which frays and breaks down or thick material like masonite that’s hard to mark small holes through, this stuff is durable and easy to work with. Here is a pattern for an arm I recently made.
It comes in 4X8’ sheets rolled up for shipping. It’s the stuff “FOR SALE'‘ signs are made of. I have some that’s .020” thick and .030” thick. Here’s a link for the .020” stuff.
It cuts with a score and snap, so you don’t need to do much beyond a light razor cut of the shape you want
.
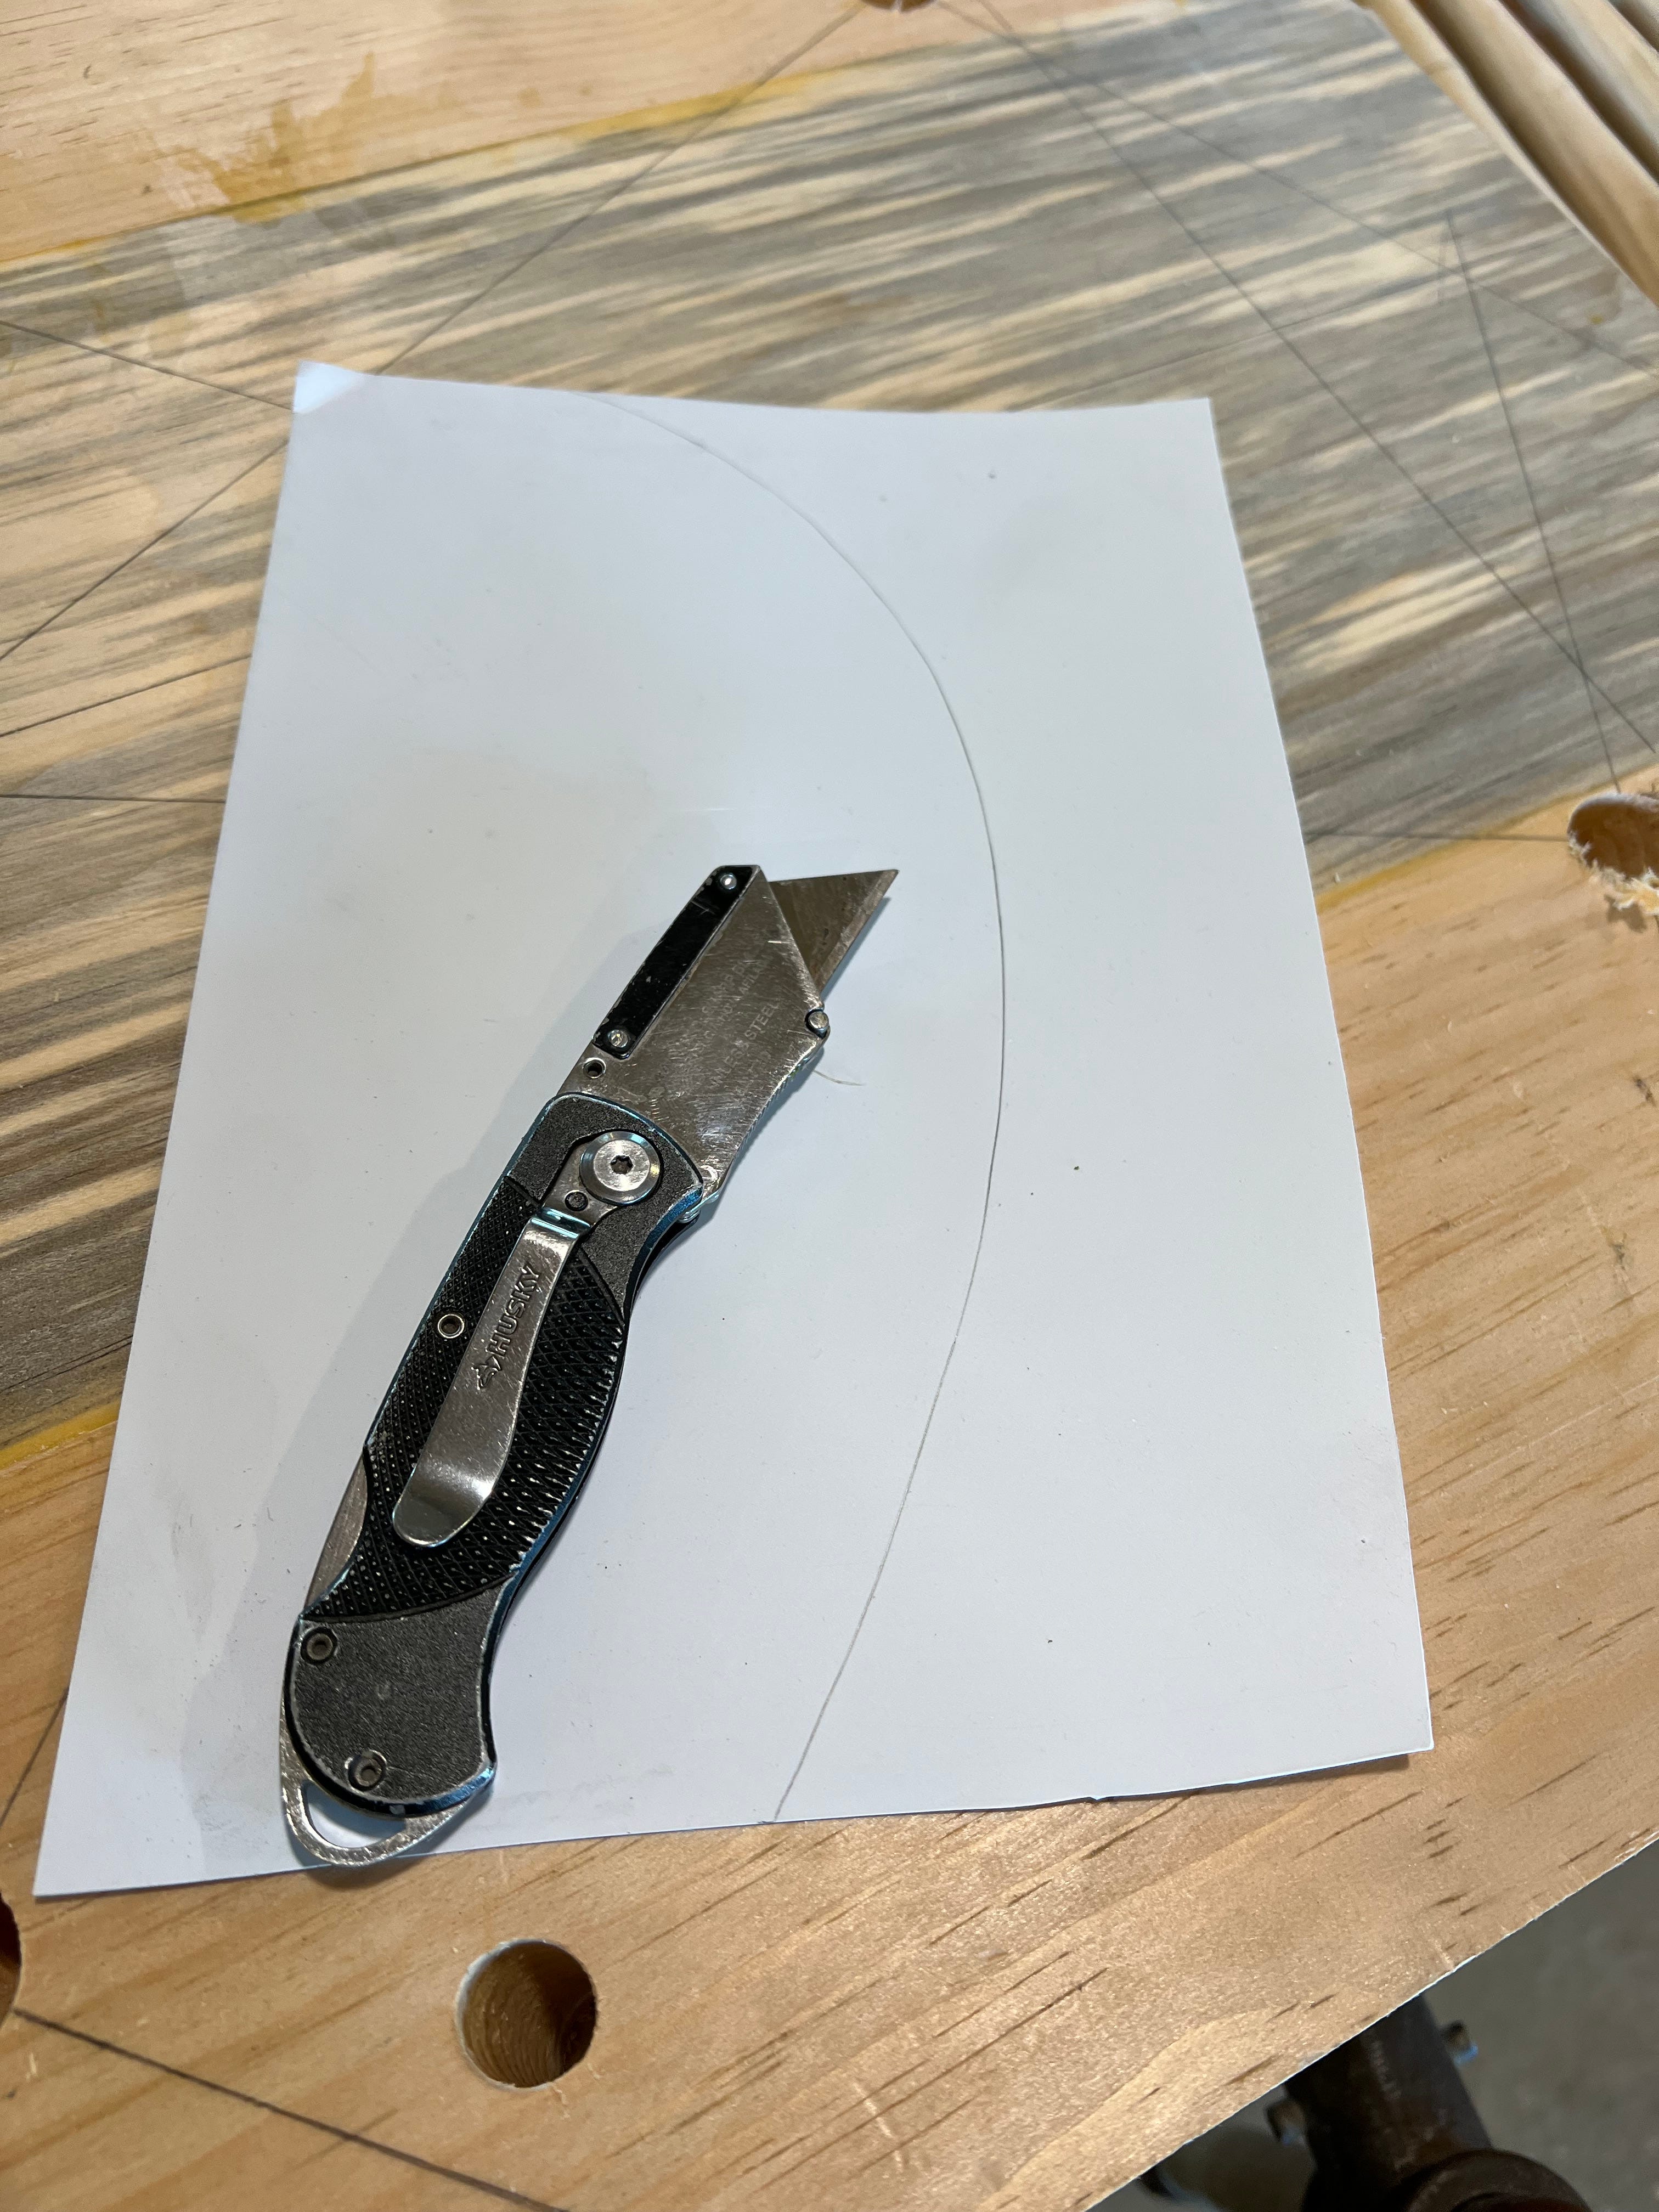
Then just snap the sheet along the line.
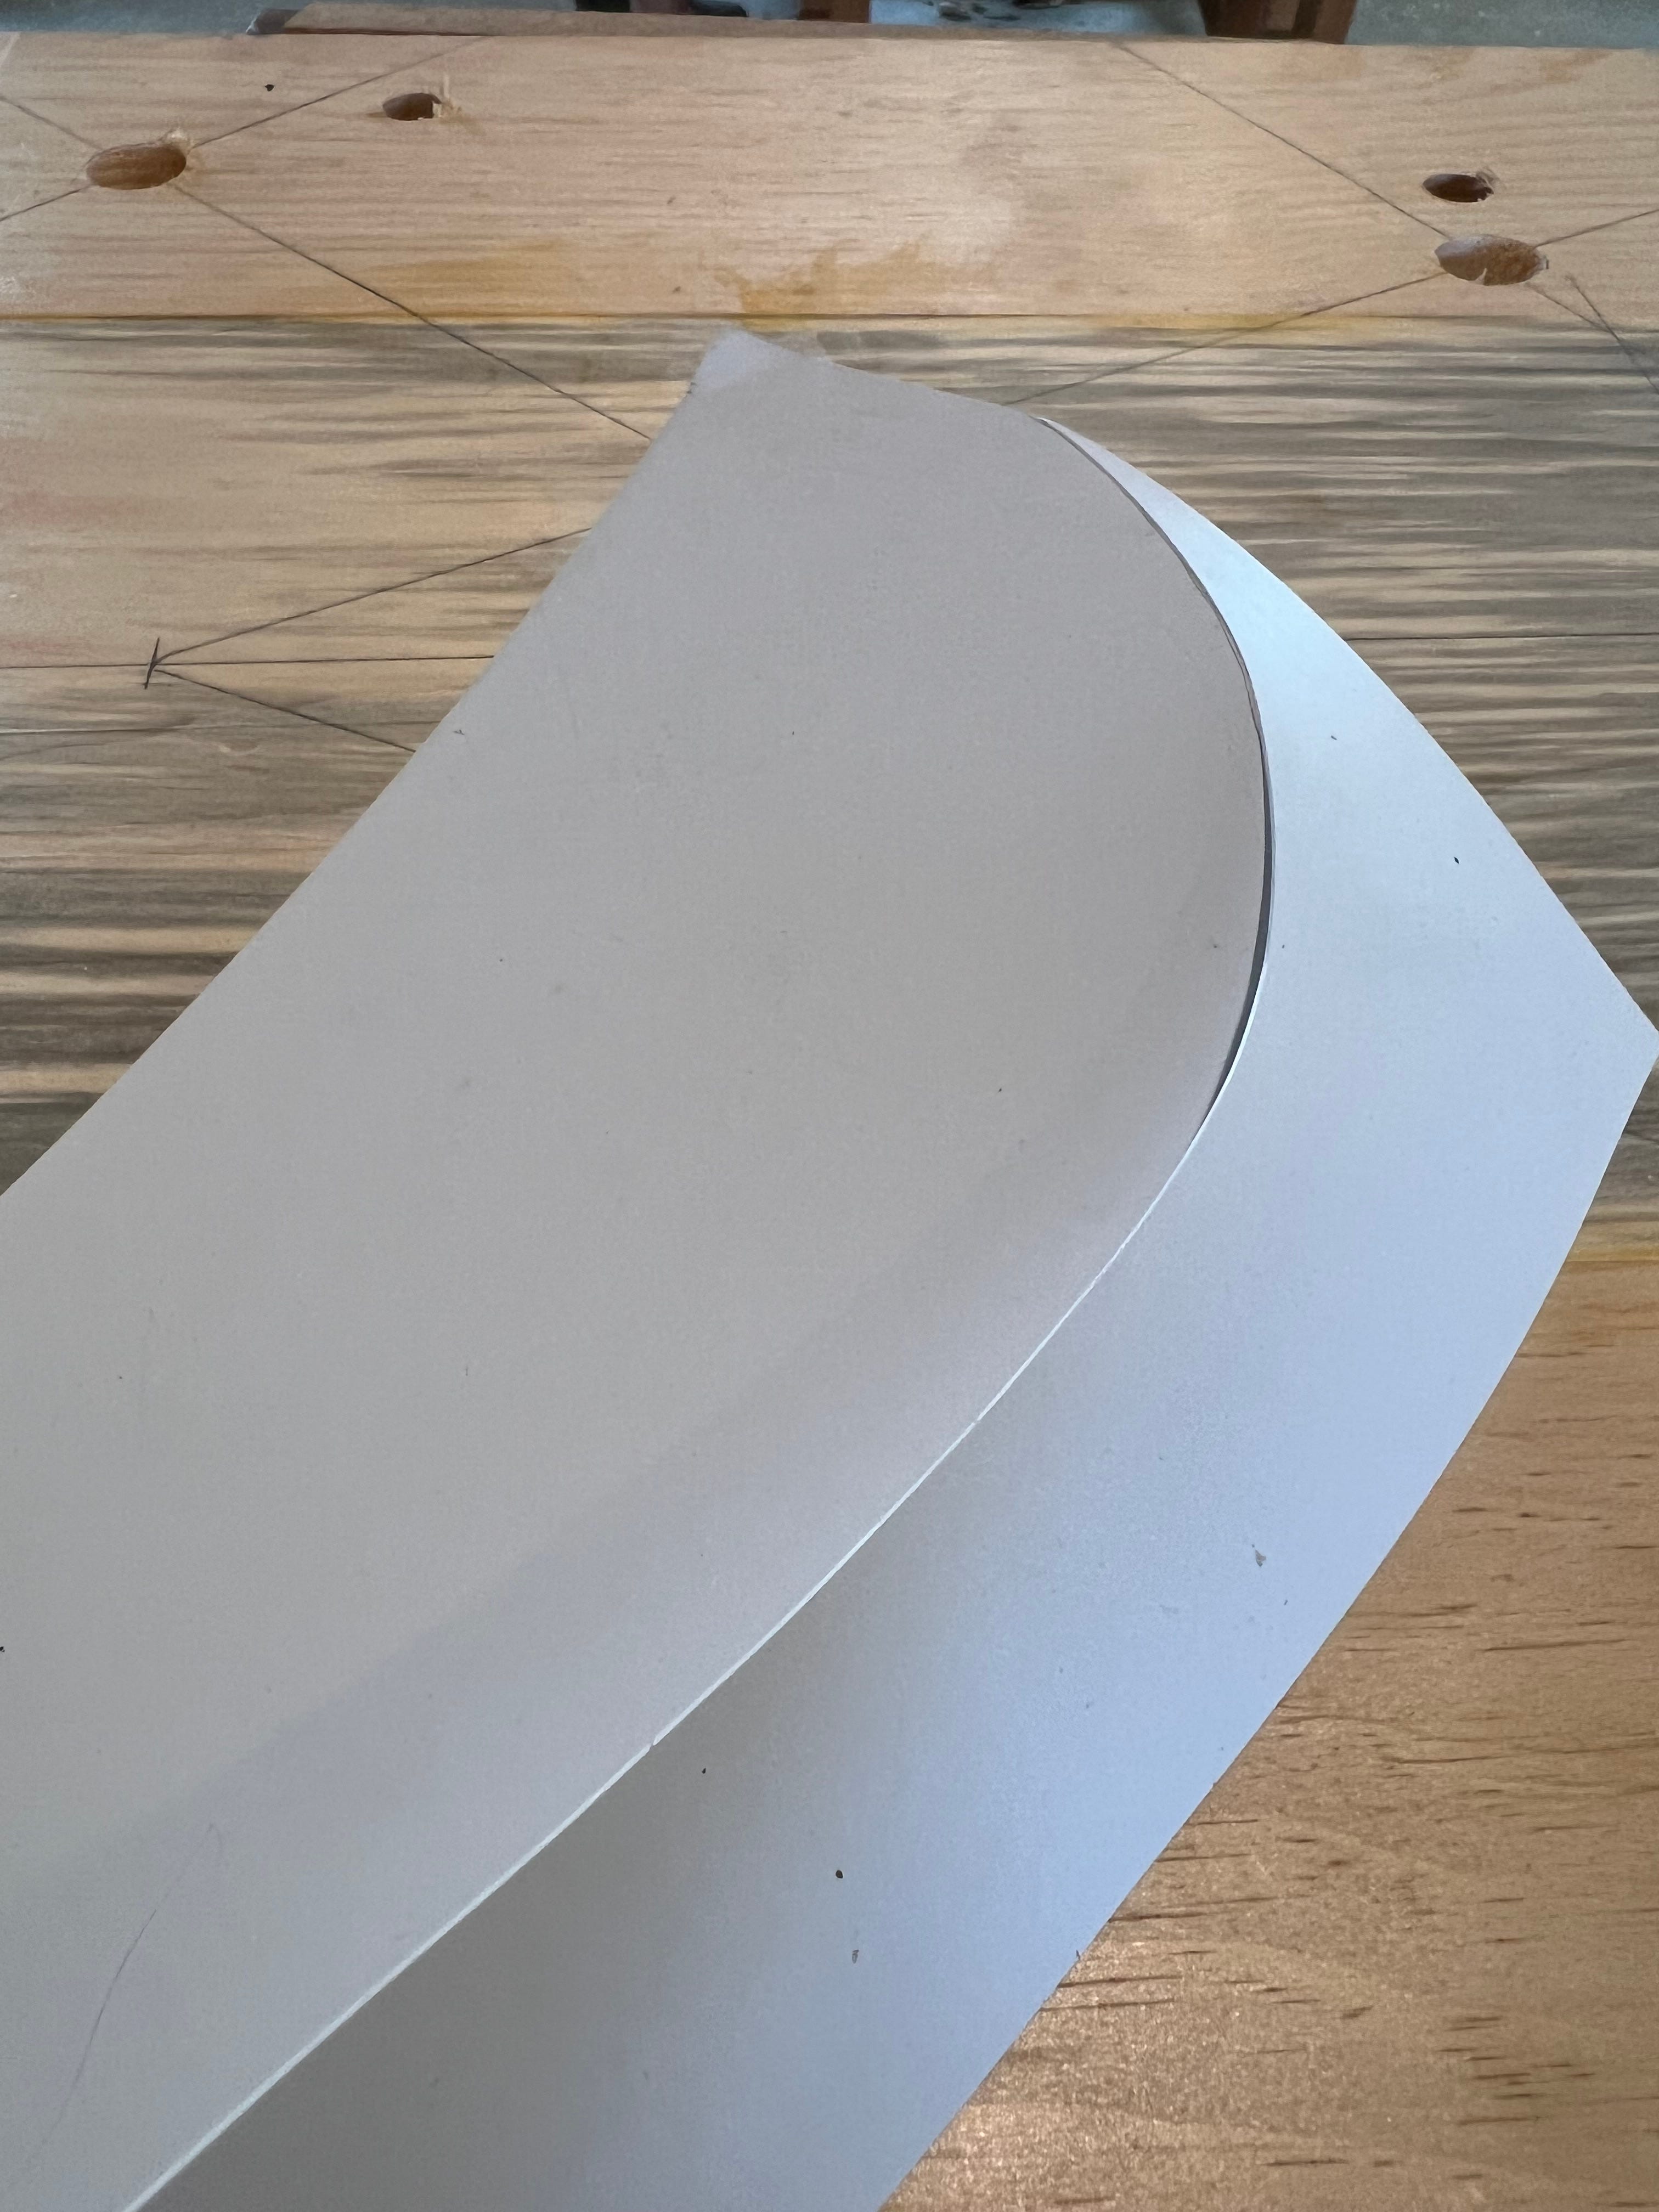
My favorite part is the way it spokeshaves beautifully, so fairing shapes is a snap.
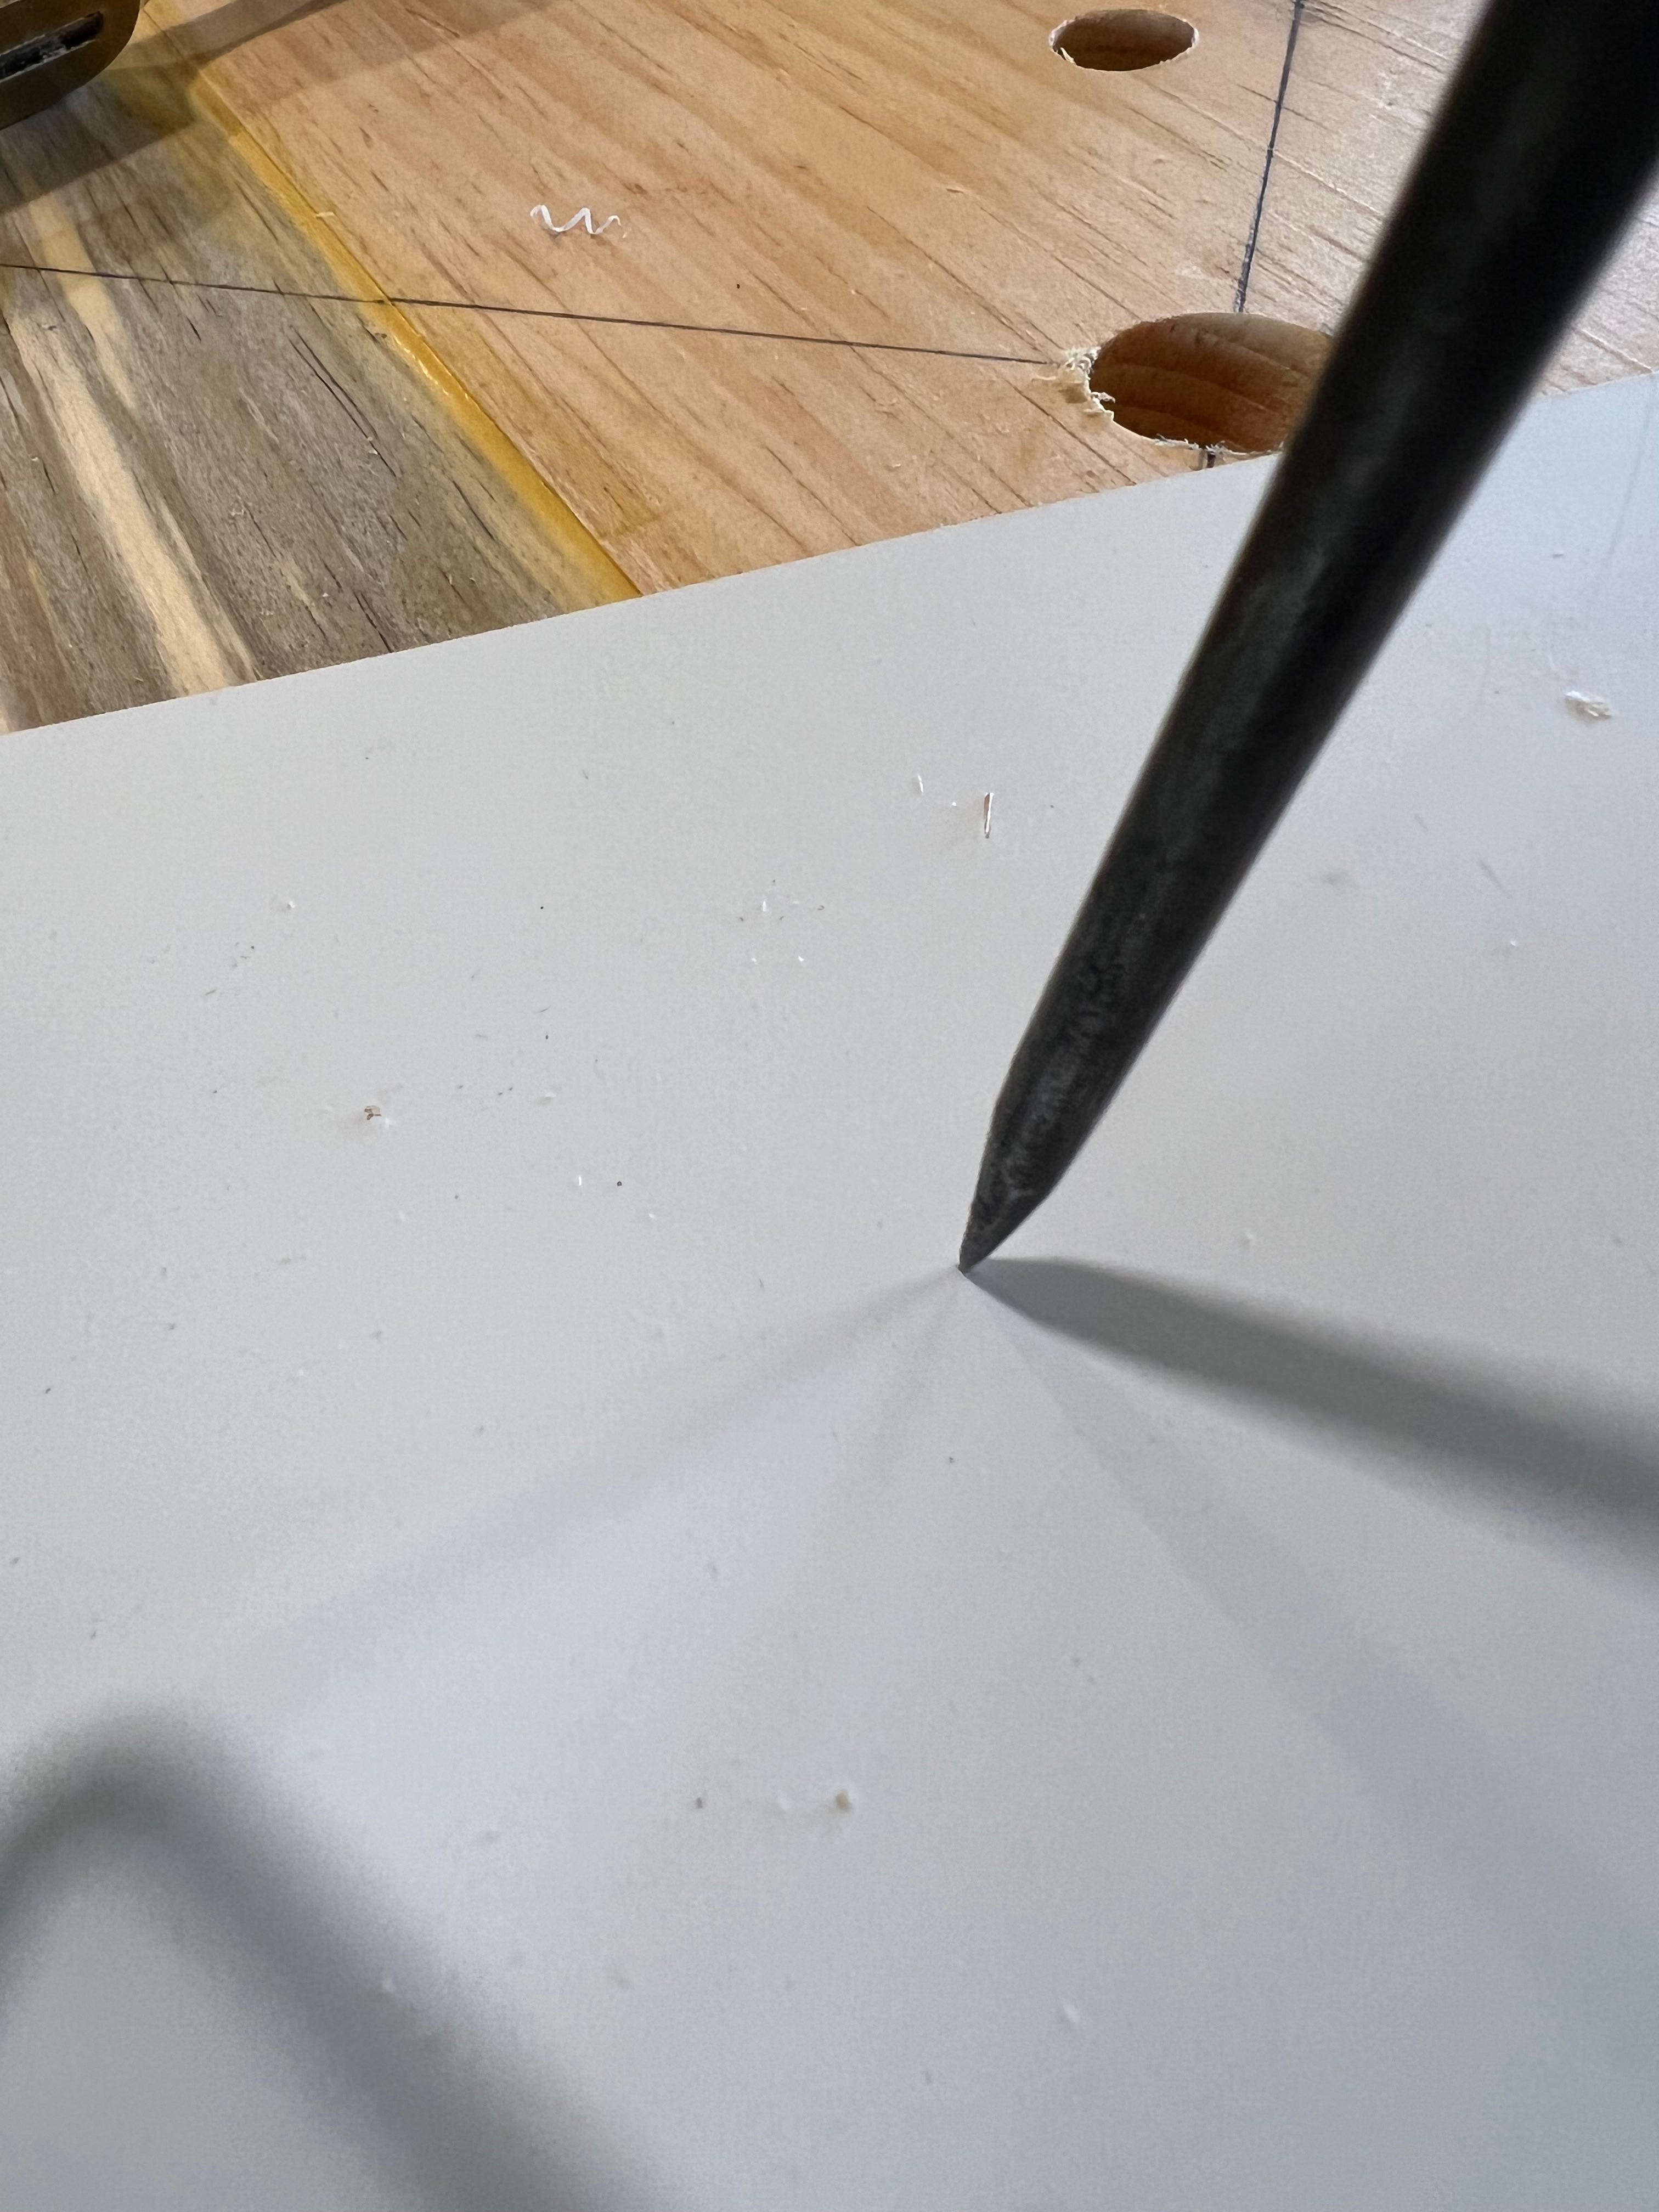
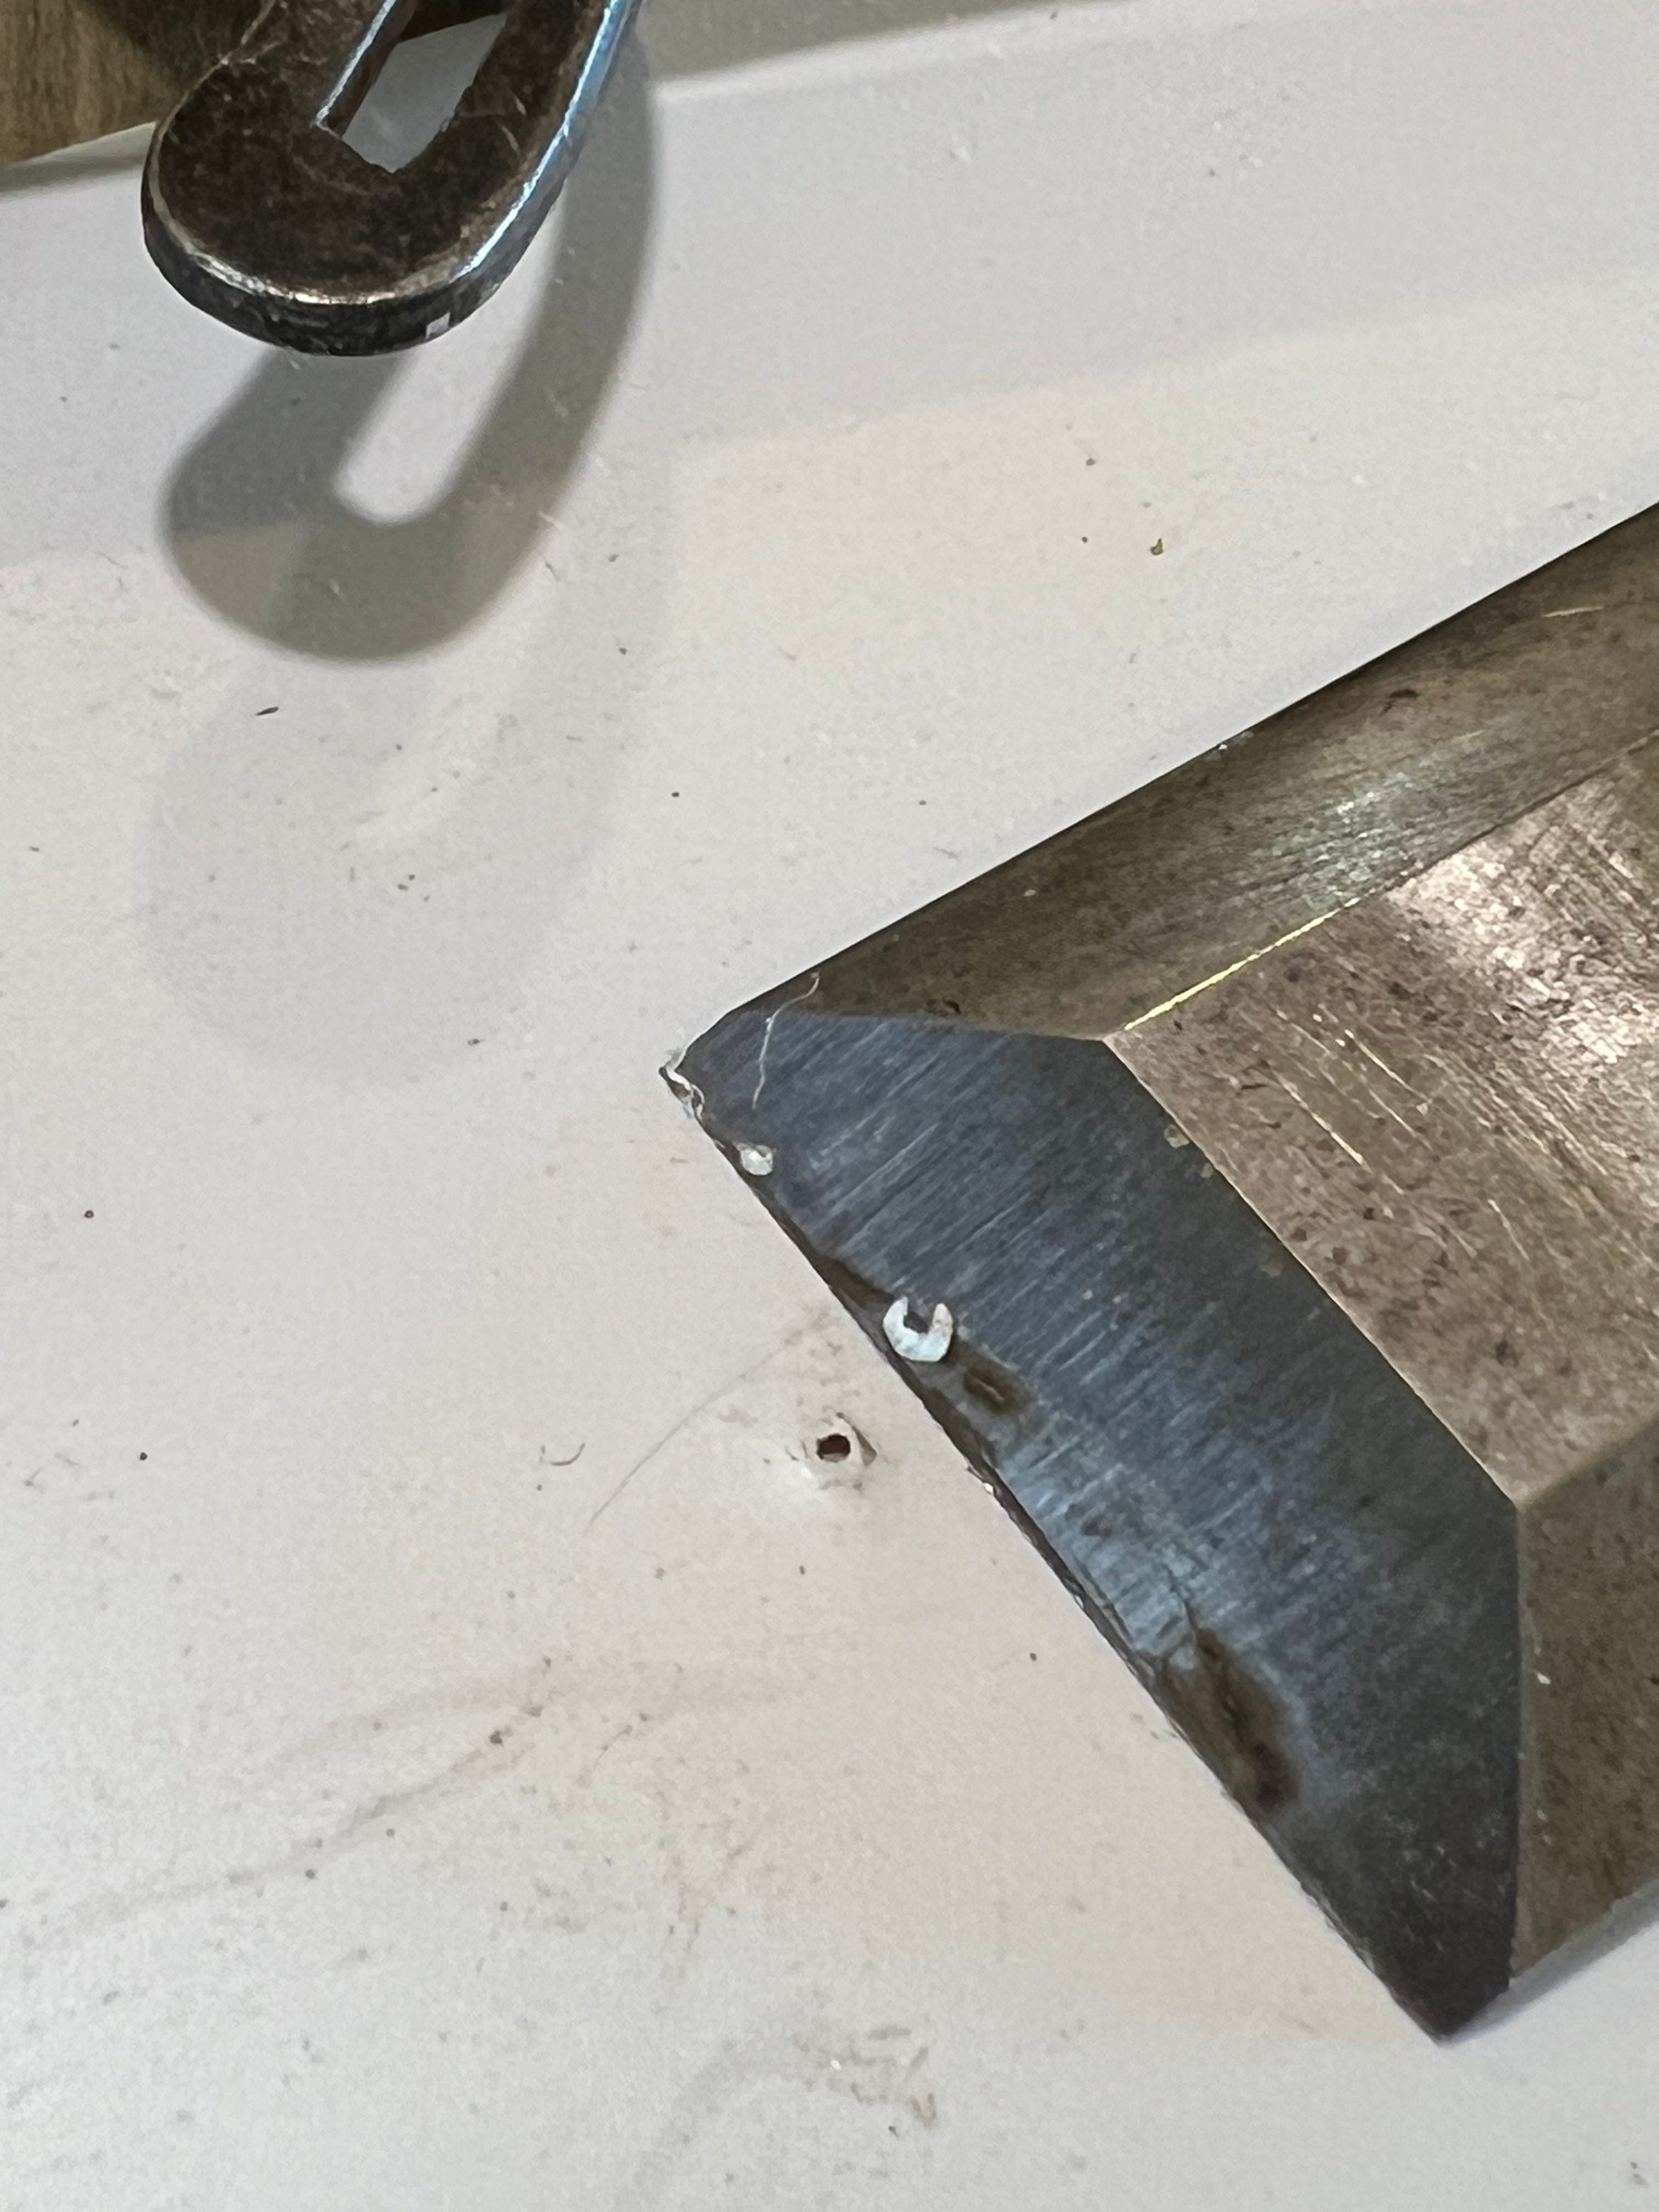
To make holes for marking drilling locations, I poke it with an awl which pushes a small button of material out the opposite face, which I trim with a chisel.
I usually use this stuff for patterns I’m creating, but you can use spray adhesive to glue paper patterns to it as well. It’s not going to adhere as cleanly as it might with poster board, but the durability of the pattern is worth it. If anyone has better ideas for transferring paper patterns to it, I’d love to hear them. Every time I pull out a tattered old posterboard pattern, I promise myself I’ll replace it with this stuff before the next time I use it. But then I get distracted thinking about finding that new machinist for the Caliper and…
I love the recommendation for the template material. It seems perfect for coping outlines on curved surfaces.
Love my T2!
For templates, I use plexiglass sheets. They come with a thin plastic film on them, which i gluestick printed plans onto. After I cut out the templates, i can peel off the anti-scratch film and have a clear, flexible, durable template. Sharpies work well on it, and because it's clear, I can see the grain perfectly on the wood as I'm laying out my parts.