
Two Balusters

In my recent post “More Solutions to Problems You Don’t Have (Yet) I mentioned some efforts I was using to smooth some coarse milk paint. I must admit that I regret posting about it without more exposition.
I’ve found that applying a thin coat of paint on top of rough paint can help dissolve the surface roughness and create a smoother, more easy to burnish surface. I have also used just water to do this, but I didn’t stress that it requires a coat of paint afterwards. Without the added paint, the surface will look blotchy once oiled.
I’m always evaluating the material I choose to share in hopes that it adds to your experience in the workshop. I have learned a valuable lesson and will redouble my efforts to only present the most clear and actionable processes.
On to the drawing.
In the recent post “The Leg Stripped Bare”, I showed how I think about a Baluster leg to help me understand the details and their relationships. Now I want to show how I draw the leg.
There are two ways of representing the leg I want to show, I think they each inform the other. One is the way that I would include an image of the leg in a gesture drawing or design sketch, the other is how I approach the details when actually making a turning pattern.
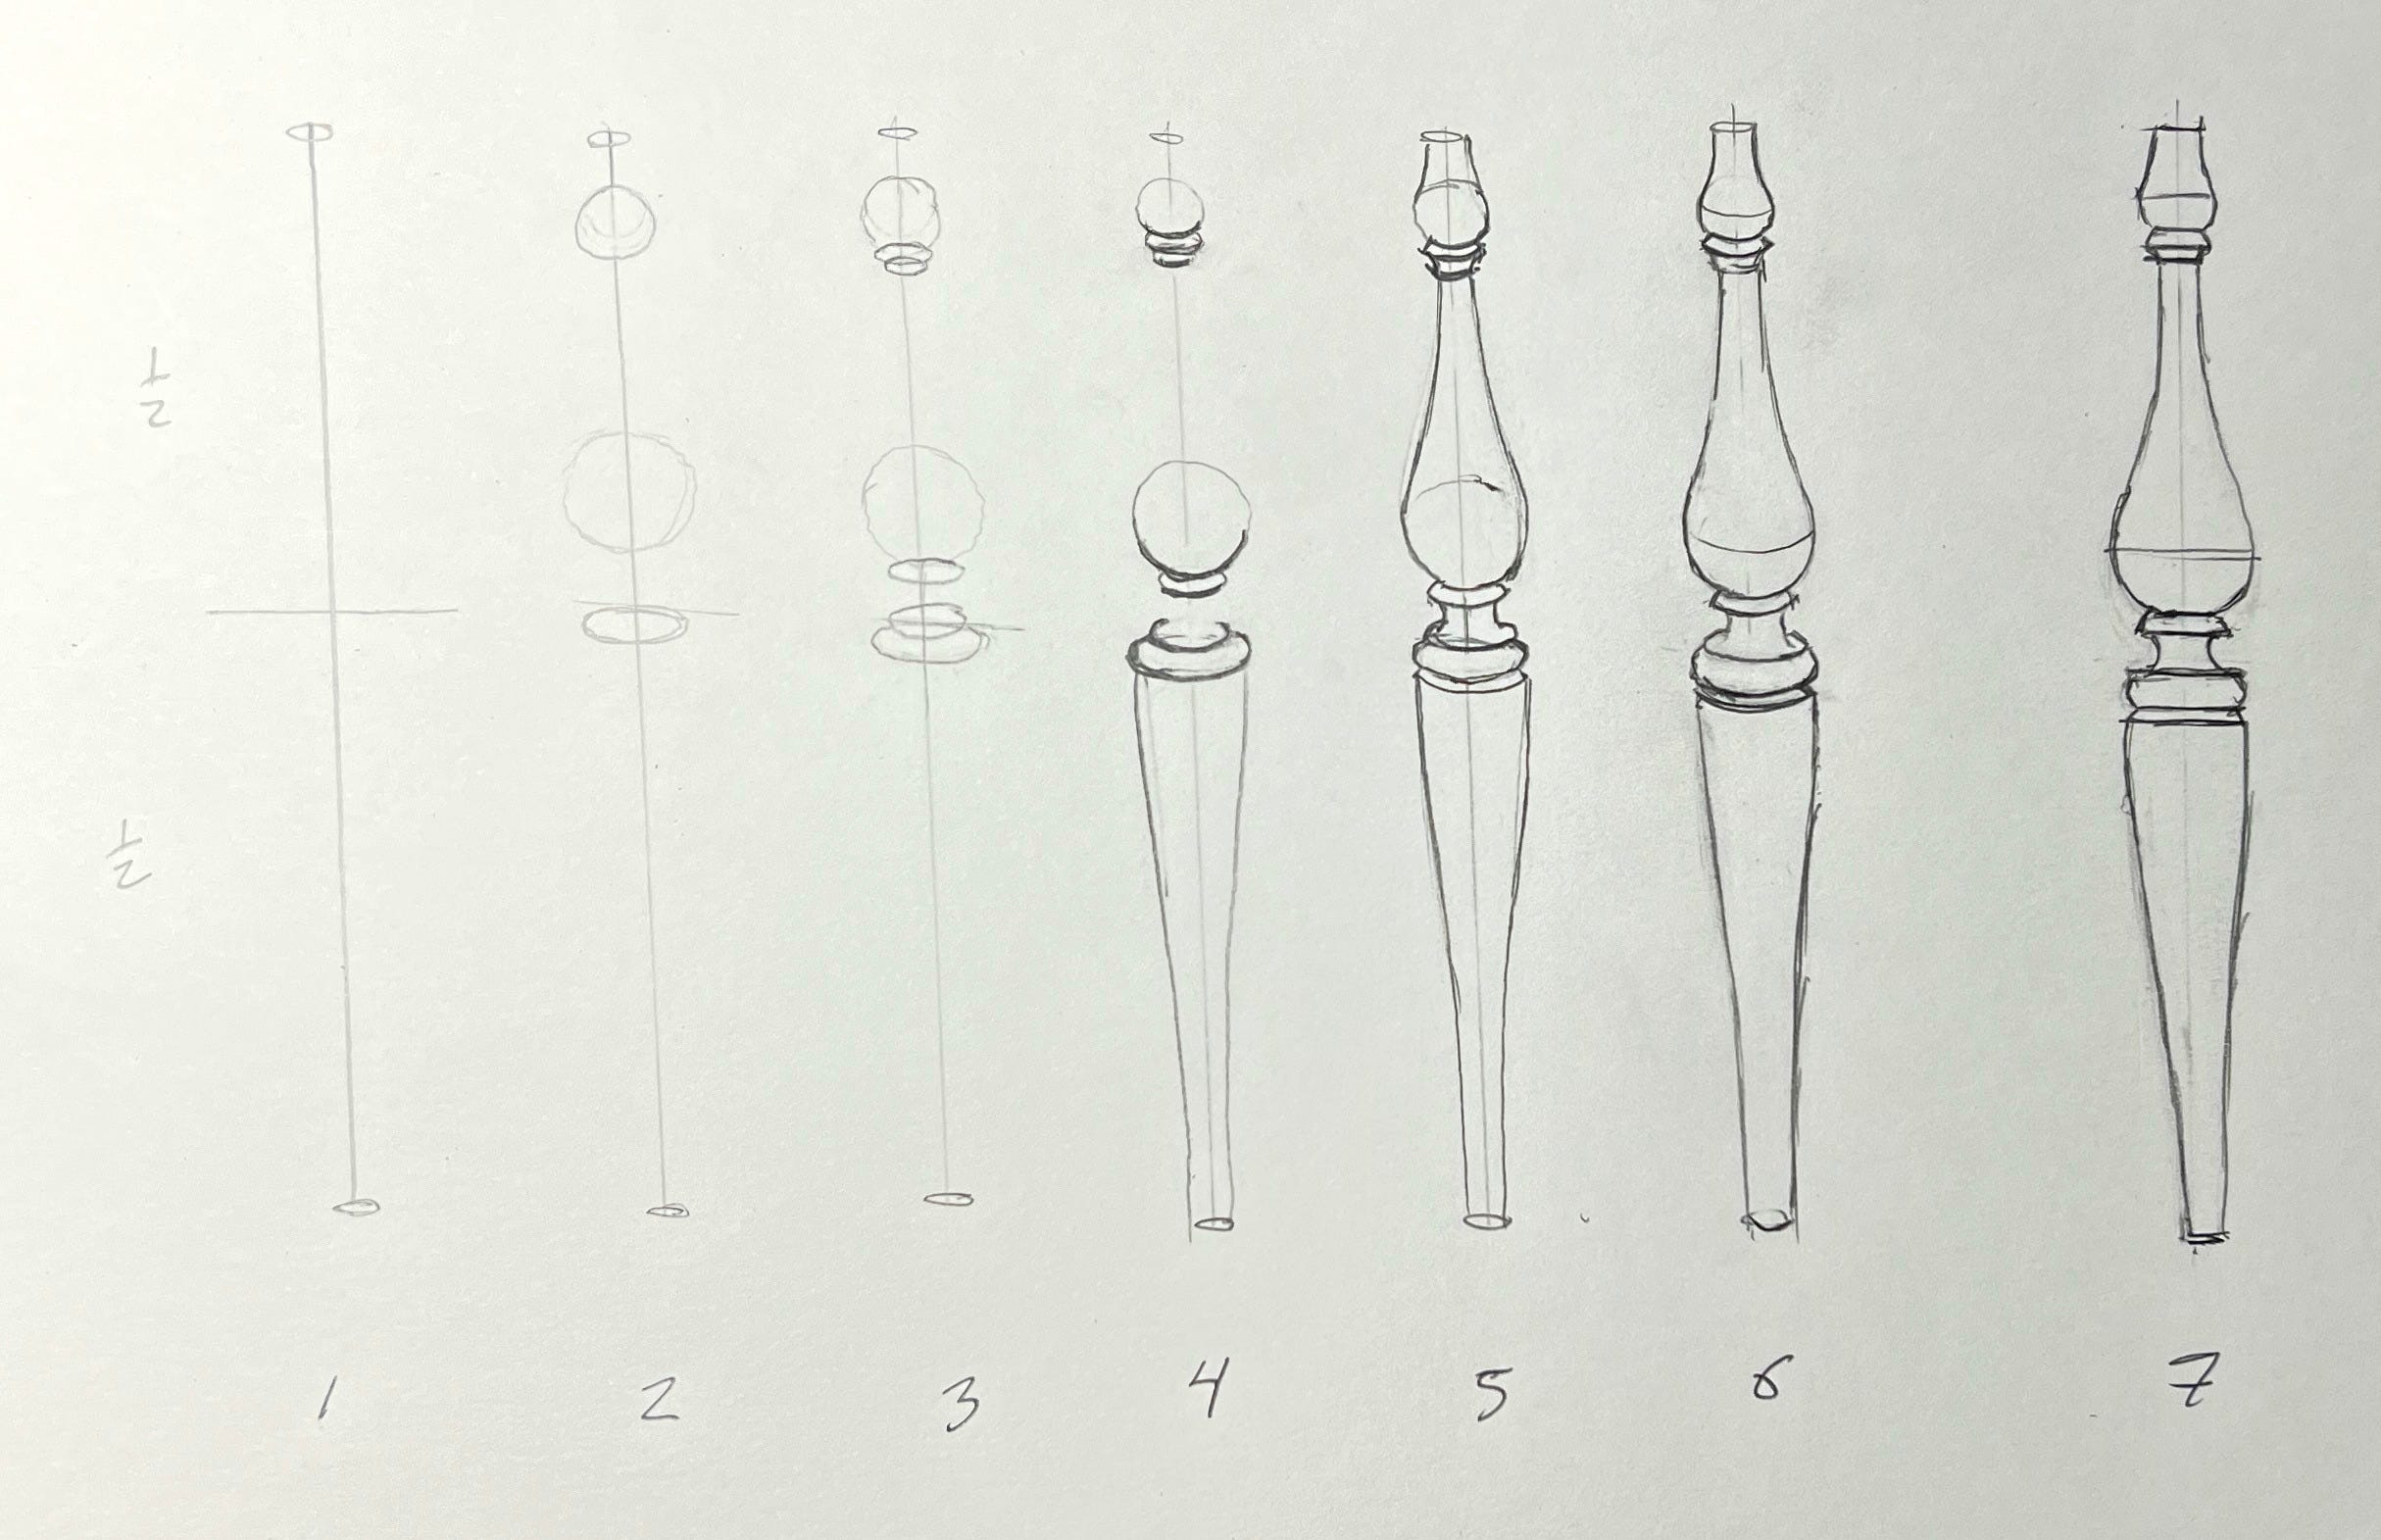
In the drawing above, steps 1-6 show how I create a leg that’s being viewed slightly from above or at an angle, which is normally how I draw them. Step 7 is the same leg depicted “flat”, or straight on at every point, the way it would be on a turning pattern. Hopefully you can see how much better #6 would look in a rendering of a chair.
Keep reading with a 7-day free trial
Subscribe to Peter Galbert's Chair Notes to keep reading this post and get 7 days of free access to the full post archives.